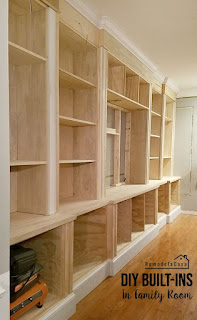
DIY Wooden Bookcases for Home Organization
Conquer Clutter: Build Your Dream Wooden Bookcases
Tired of overflowing bookshelves and haphazard stacks of belongings? Reclaim your space and unleash your inner craftsman with a DIY wooden bookcase project! Building your own bookcase is a rewarding experience that allows you to customize the size, style, and finish to perfectly complement your home décor. Forget flimsy, mass-produced units; we'll guide you through creating a sturdy, elegant, and completely personalized storage solution that will house your treasures for years to come. This project might seem daunting at first, but by breaking it down into manageable steps, you'll discover it's more achievable than you think. Let's get started!
Planning Your Perfect Bookcase
Before you reach for your saw, careful planning lays the groundwork for success. Measure your available space precisely. Consider the height, width, and depth needed to comfortably accommodate your books and other items. Sketch your design, noting the number of shelves, their spacing, and the overall dimensions. Consider the style â€" a classic, minimalist design or something more ornate? Choosing your wood is crucial. Pine offers affordability and ease of working, while hardwoods like oak or maple provide durability and a richer aesthetic. Remember to factor in the cost of materials and tools before you begin. A detailed plan saves time, frustration, and potentially costly mistakes.
Choosing Your Materials and Tools
Once your design is finalized, gather your materials. You'll need wood planks (consider pre-cut lumber for ease), wood screws, wood glue, sandpaper (various grits), wood stain or paint (optional), and a protective sealant. Your tool kit should include a measuring tape, saw (circular saw or hand saw), drill, screwdriver bits, clamps, safety glasses, and a level. Investing in quality tools will make the process smoother and safer. If you lack certain tools, consider borrowing from a friend or renting them from a local hardware store. Don't forget to account for any extra wood you may need for cutting mistakes or adjustments.
Building Your Bookcase: A Step-by-Step Guide
With your plan and materials ready, it's time to build! Begin by cutting your wood to the precise dimensions outlined in your design. Use a saw guide for straight, accurate cuts. Apply wood glue to the joints and secure them with wood screws. Ensure all joints are square and aligned using a level and clamps for maximum stability. Pre-drilling pilot holes before screwing prevents wood splitting. This step is critical for a strong and lasting bookcase.
Assembling the Shelves and Sides
Assemble the sides of your bookcase first, carefully attaching them to the top and bottom supports. Then, attach your shelves, ensuring they are evenly spaced and level. Use your clamps to maintain pressure on the joints while the glue dries completely. This process requires patience and precision. Take your time, double-checking your measurements at each step. Remember, the strength of your bookcase hinges on the accuracy of your construction.
Finishing Touches: Sanding, Staining, and Sealing
Once your bookcase is assembled, it's time to refine its appearance. Sand all surfaces thoroughly using progressively finer grits of sandpaper, removing any rough edges or imperfections. This step ensures a smooth finish for painting or staining. Apply your chosen stain or paint according to the manufacturer's instructions, allowing each coat to dry completely before applying the next. Finally, seal the bookcase with a protective finish to enhance its durability and resistance to moisture. This will safeguard your creation from everyday wear and tear, ensuring its longevity.
Enjoy Your New Bookcase!
Congratulations! You've successfully built your own custom wooden bookcase. Arrange your books, photos, and other treasured items on the shelves, admiring the fruits of your labor. This DIY project not only saves you money but also provides immense satisfaction. Remember, your creation is unique and tailored to your needs. Now you can enjoy a stylish and functional storage solution, knowing you crafted it with your own two hands. Feel free to personalize your bookcase further with additional features, such as decorative molding or unique hardware.


